|
CentOS5対応 |
Postfix Dovecot インストール
Postfixインストール
[root@centos ~]# yum -y install postfix Postfix設定
[root@centos ~]# vi /etc/postfix/main.cf
SMTP AUTH設定
[root@centos ~]# vi /usr/lib/sasl2/smtpd.conf ←32bitの場合 [root@centos ~]# vi /usr/lib64/sasl2/smtpd.conf ←64bitの場合
SMTP AUTHユーザー追加
[root@centos ~]# saslpasswd2 -c -u centos.orz user_name
Password: user_pass ←パスワード入力(SMTP AUTH認証用)
Again (for verification): user_pass ←パスワード再入力
[root@centos ~]# sasldblistusers2 ←メールユーザー確認
user_name@centos.orz: userPassword
/etc/sasldb2所有権変更
[root@centos ~]# chgrp postfix /etc/sasldb2
[root@centos ~]# chmod 640 /etc/sasldb2
sendmail停止
[root@centos ~]# /etc/rc.d/init.d/sendmail stop
[root@centos ~]# chkconfig sendmail off
[root@centos ~]# alternatives --config mta
2 プログラムがあり 'mta'を提供します。

  選択       コマンド
-----------------------------------------------
*+ 1           /usr/sbin/sendmail.sendmail
   2           /usr/sbin/sendmail.postfix

Enterを押して現在の選択[+]を保持するか、選択番号を入力します:2 ←2(postfix)を入力してエンター
Postfix起動
[root@centos ~]# /etc/rc.d/init.d/postfix start
[root@centos ~]# chkconfig postfix on
[root@centos ~]# chkconfig --list postfix
postfix         0:off   1:off   2:on    3:on    4:on    5:on    6:off
Dovecotインストール
[root@centos ~]# yum -y install dovecot dovecot.conf編集
[root@centos ~]# vi /etc/dovecot.conf dovecot起動
[root@centos ~]# /etc/rc.d/init.d/dovecot start
[root@centos ~]# chkconfig dovecot on
[root@centos ~]# chkconfig --list dovecot
dovecot         0:off   1:off   2:on    3:on    4:on    5:on    6:off
メールエイリアスのデータベース再構築
[root@centos ~]# vi /etc/aliases 既存ユーザー用メールディレクトリ作成
[root@centos ~]# mkdir -p /home/user_name/Maildir/{cur,new,tmp}
[root@centos ~]# chmod -R 700 /home/user_name/Maildir
[root@centos ~]# chown -R user_name:user_name /home/user_name/Maildir
追加ユーザー用メールディレクトリ作成
[root@centos ~]# mkdir -p /etc/skel/Maildir/{cur,new,tmp}
[root@centos ~]# chmod -R 700 /etc/skel/Maildir/
procmail設定
[root@centos ~]# vi /etc/procmailrc Procmailログローテーション
[root@centos ~]# vi /etc/logrotate.d/procmail POP3接続確認
[root@centos ~]# telnet localhost 110
Trying 127.0.0.1...
Connected to localhost.localdomain (127.0.0.1).
Escape character is '^]'.
+OK Dovecot ready.
USER user_name
+OK
PASS user_pass
+OK Logged in.
LIST
+OK 0 messages:
.
QUIT
+OK Logging out.
Connection closed by foreign host.
BASE64エンコードでパスワード作成
[root@centos ~]# perl -MMIME::Base64 -e 'print encode_base64("user_name\0user_name\0user_pass");'
dXNlcl9uYW1lAHVzZXJfbmFtZQB1c2VyX3Bhc3M=
SMTP接続確認
[root@centos ~]# telnet localhost 25
Trying 127.0.0.1...
Connected to localhost.localdomain (127.0.0.1).
Escape character is '^]'.
220 centos.orz ESMTP Postfix
EHLO localhost
250-centos.orz
250-PIPELINING
250-SIZE 10240000
250-VRFY
250-ETRN
250-AUTH LOGIN PLAIN
250-AUTH=LOGIN PLAIN
250-ENHANCEDSTATUSCODES
250-8BITMIME
250 DSN
AUTH PLAIN dXNlcl9uYW1lAHVzZXJfbmFtZQB1c2VyX3Bhc3M=
235 2.0.0 Authentication successful
QUIT
221 2.0.0 Bye
Connection closed by foreign host.
メール送信テスト
[root@centos ~]# echo test|mail user_name
[root@centos ~]# ls /home/user_name/Maildir/new
1271581750.5214_0.centos.centos.orz
[root@centos ~]# rm -f /home/user_name/Maildir/new/* ←削除
Outlook Expressの設定(POPの場合)
Outlook Expressの設定(IMAPの場合)
不正中継テスト
|
||||
 ヒント
ヒント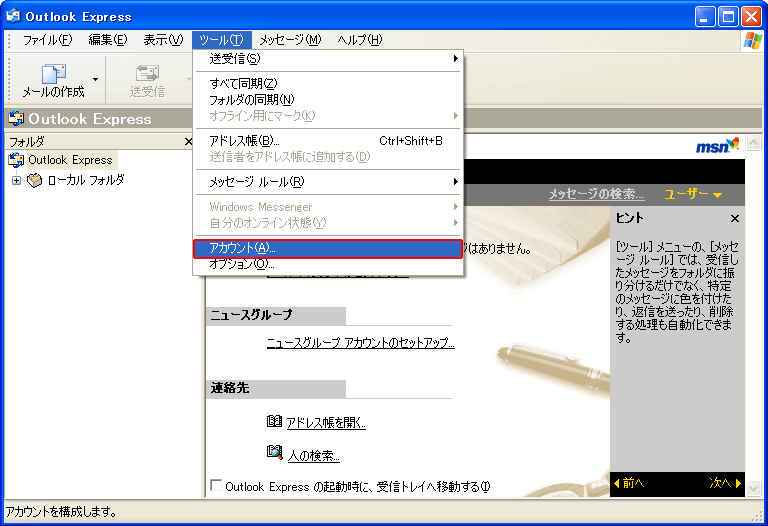 1.上部メニューから「ツール」>「アカウント」をクリック。
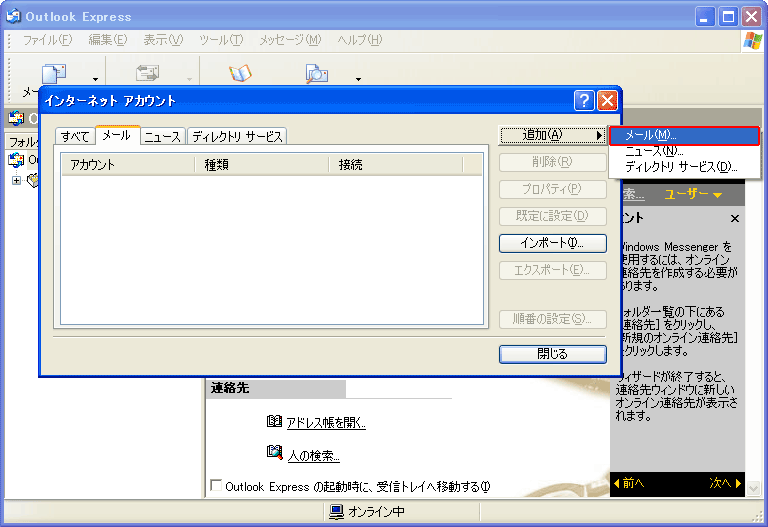 2.「追加」>「メール」をクリック。
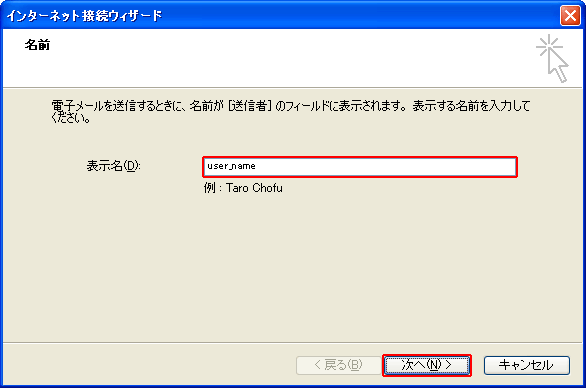 3.「表示名」を入力して「次へ」をクリック。
 4.「電子メールアドレス」を入力して「次へ」をクリック。
 5.「受信メールサーバーの種類」から「POP3」を選択。
「受信メールサーバー」「送信メールサーバー」にサーバーのホスト名またはIPアドレスを入力して「次へ」をクリック。
5.「受信メールサーバーの種類」から「POP3」を選択。
「受信メールサーバー」「送信メールサーバー」にサーバーのホスト名またはIPアドレスを入力して「次へ」をクリック。
 6.アカウント名とパスワードを入力して「次へ」をクリック。
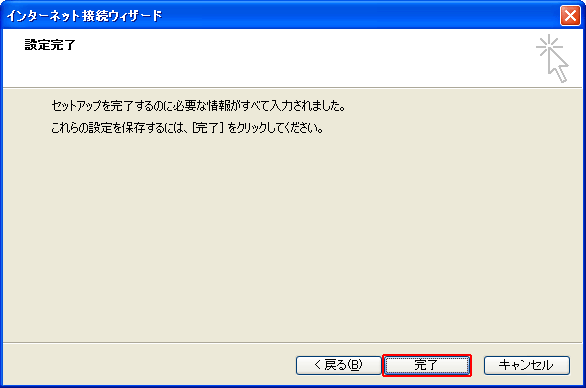 7.「完了」をクリック。
 8.アカウントを選択して「プロパティ」をクリック。
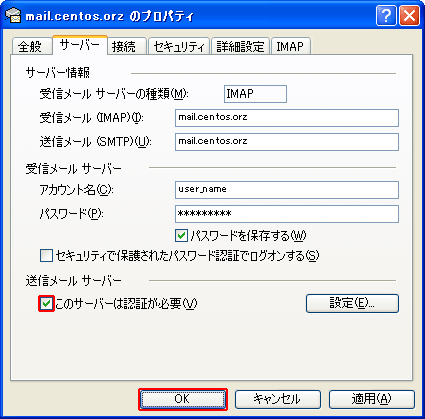
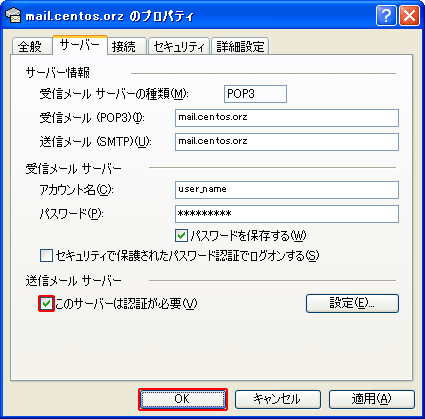 9.サーバータブを開き「このサーバーは認証が必要」にチェックを入れて「OK」をクリック。
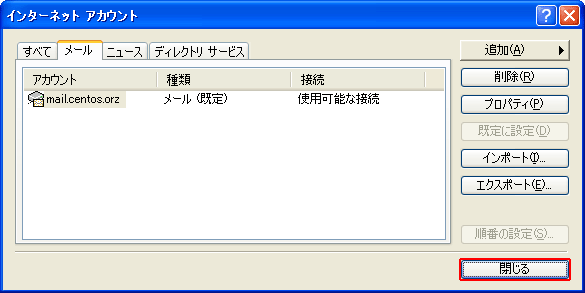
 10.「閉じる」をクリック。
 1.上部メニューから「ツール」>「アカウント」をクリック。
 2.「追加」>「メール」をクリック。
 3.「表示名」を入力して「次へ」をクリック。
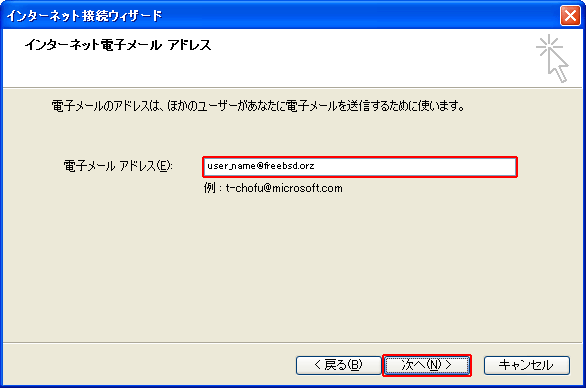 4.「電子メールアドレス」を入力して「次へ」をクリック。
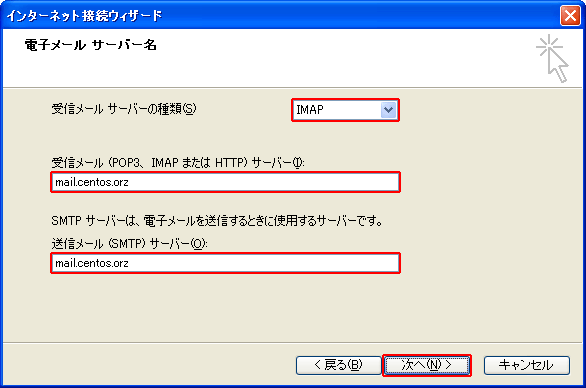 5.「受信メールサーバーの種類」から「IMAP」を選択。
「受信メールサーバー」「送信メールサーバー」にサーバーのホスト名またはIPアドレスを入力して「次へ」をクリック。
5.「受信メールサーバーの種類」から「IMAP」を選択。
「受信メールサーバー」「送信メールサーバー」にサーバーのホスト名またはIPアドレスを入力して「次へ」をクリック。
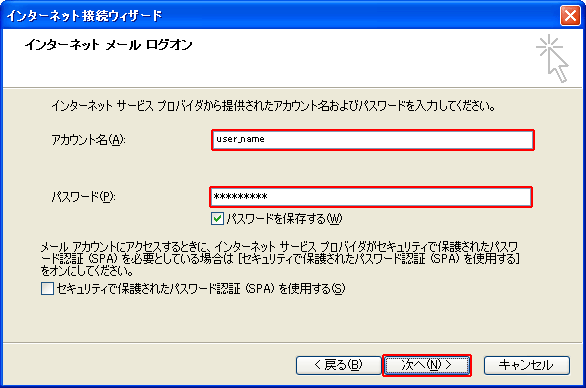 6.アカウント名とパスワードを入力して「次へ」をクリック。
 7.「完了」をクリック。
 8.アカウントを選択して「プロパティ」をクリック。
 9.サーバータブを開き「このサーバーは認証が必要」にチェックを入れて「OK」をクリック。
 10.「閉じる」をクリック。
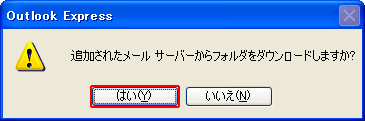 11.「はい」をクリック。
 12.「OK」をクリック。
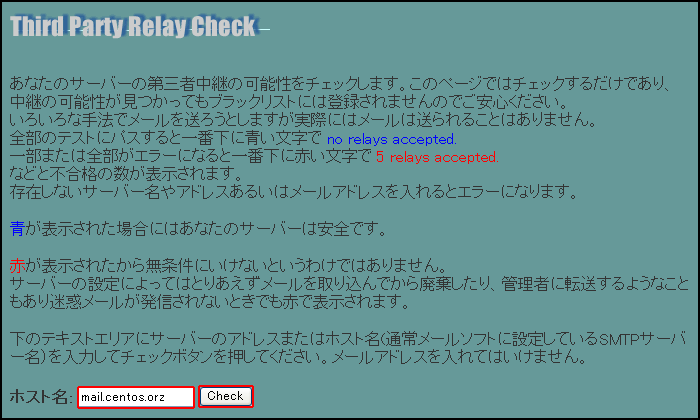 1.
1.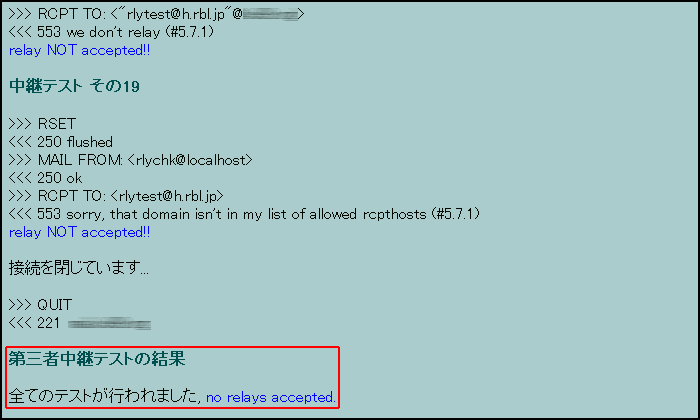 2.「no relays accepted.」と表示されたら問題なし。
 外部に公開する場合

Copyright (C) 2012 centos.server-manual.net All Rights Reserved.
Template design by Nikukyu-Punch